
Archive for the ‘Scientific Software’ Category
The Sheffield Open Data Science Initiative
The University of Sheffield Open Data Science Initiative (ODSI) is really starting to take off. So what is it?
From the website, the aims of the ODSI are:
- Make new analysis methodologies available as widely and rapidly as possible with as few conditions on their use as possible (see the ML@SITraN group software pages and the local software page).
- Educate our commercial, scientific and medical partners in the use of these latest methodologies (see http://gpss.cc)
- Act to achieve a balance between data sharing for societal benefit and the right of an individual to own their data. (see our summary of our efforts in public understanding and debate)
My role within this initiative is to work on various aspects of research software throughout the University of Sheffield (and beyond!). I am a fellow of the Software Sustainability Institute and you could sum up everything I try to do with their motto Better Software, Better Research.
Join us on October 20th 2015
We have just started a programme of events which aims to bring together a wide variety of people interested in data, machine learning and research software (my favourite part!). The first such event is at The Data Hide on October 2015 at University of Sheffield.
There will be talk on Research Data Management for Computational Science by @ctjacobs_uk as well as lightning talks: What Kind of AI are we Creating? by @lawrennd, Machine Learning for Chemical Simulations by Chris Handley and a demonstration of how great Reveal.js is by me.
This will be followed by food, beer and an opportunity to chat and geek out.
We would be honoured if you would join us.
- Register for a free ticket (Only 40 places currently and they are ‘selling’ out fast!)
- Details of the October 20th event
Would you like to present at a future event?
Contact me to see what we can do together.
If you change it, It will break
“It only works on the Windows version of MATLAB 2010a. The code doesn’t work on Linux or other versions of MATLAB.” explained the researcher. He needed to run his program hundreds of times and his solution was to lock himself into a computer room over the weekend, log into the two dozen managed desktop machines there and manually start his code running on each one. Along with colleagues from the University of Manchester, I was trying to understand why he couldn’t use the Linux-based 3000+ core Condor pool we’d built since it was perfectly suited to his workflow.
Now, when he said ‘doesn’t work‘ what he meant was ‘gives different results’ and the only ones he liked were the ones that came from MATLAB 2010a on Windows. Naturally, I offered to take a look at his code with a view to figuring out what was going on but he simply wasn’t interested. Once he determined that we couldn’t (or more accurately, wouldn’t) stop his current workflow he thanked us for our interest and left.
Different strokes results for different folks
This wasn’t the first time I had discovered research code that gave different results when run on different operating systems or runtimes and it probably won’t be the last. A relatively high profile case that caught my eye recently was a publication that demonstrated that the results of a program called FreeSurfer varied according to operating system, workstation type and software version.
I suspect that the phenomenon might be more prevalent than we think because I suspect (but confess to having no evidence) that a large number of computational research results come from research code that’s only ever been run on one operating system, with one set of dependencies on one particular piece of hardware.
Experience has shown me that some researchers deal with this lack of robustness by keeping their working environment as constant as possible. Don’t. Touch. Anything!
The shifting sands of Windows 10
A huge percentage of researchers conduct their research using Windows and the Windows environment is about to change in a rather fundamental way: Updates will be automatic and mandatory.
Since the operating system will be constantly shifting under their feet, researchers are no longer going to be able to keep that aspect of their environment stable.
I wonder if or how this will change things in the world of research software. Perhaps it will go by unnoticed, perhaps more test-suites will be written or perhaps something else?
Any thoughts?
You’ve written a computer program in your favourite language as part of your research and are getting some great-looking results. The results could change everything! Perhaps they’ll influence world-economics, increase understanding of multidrug resistance, improve health and well-being for the population of entire countries or help with the analysis of brain MRI scans.
Thanks to you and your research, the world will be a better place. Life is wonderful; this is why you went into research.
It’s just a shame that you’re completely wrong but don’t yet know it.
What went wrong?
If you click on any of the studies linked to above, you’ll find a common theme – problems with software. These days it’s close to impossible to do science without either using or developing specialist software. Using research software can be difficult, complex and extremely time consuming. Developing it is orders of magnitude more difficult.
What can be done?
When I’m writing code, my first and main assumption is always ‘I can be an idiot and will make mistakes.’ Some people I’ve worked with assume that I’m either being self-deprecating or have a self-confidence problem when I talk like this. The reality is that it’s simply true. I’m fallible: my knowledge of everything is incomplete and if I haven’t had at least two cups of coffee in the morning, I’m essentially good for nothing.
Rather than lament my weaknesses, I try to develop methods of working that mitigate my inevitable stupidity. These methods are actually very simple.
- Write tests. Every programming language worth its salt provides testing frameworks (e.g. Python, MATLAB, R). Learn how to use them and use them whenever you can. Whenever you make a change to your code or install it somewhere new, run your tests to see if anything has broken.
- Get a code buddy. Find yourself another programmer and hand them your code with the remit ‘Tell me where you think I could do better’. This will be a painful experience. Suck it up because your code will almost certainly be better as a result. There is only one true measure of code quality!
- Use version control. It doesn’t matter if its git, SVN, Mercurial or whatever the particular flavour of the month is. Choose a system, learn it and use it (for the record, I use git and have a twitter account called @git_tricks that posts tips on how to use it). When you use your code to get results, refer back to the actual commit that you used to get those results. This greatly assists the reproducibility of your research. If you cannot reproduce your own results with your own code and data, neither can anyone else.
- Share code as openly as possible. Ideally, ‘openly’ should mean on the public internet. GitHub, blog posts, personal websites etc. Whenever I’ve posted code here on WalkingRandomly, mistakes usually get caught very quickly. Geeks love telling other geeks that they’ve made a mistake. Sure, your pride takes a hit but you quickly become immune to such things. The code is better, you learn something useful and the geeks that point out your errors feel good about themselves. Everyone’s a winner.
Sadly, the great majority of scientists I work with really don’t want to share their code openly for numerous reasons and so much of the stuff I’ve worked on is in the dark. Sometimes, collaborators don’t even want to share code with me.I’m about to start work on one optimisation case where the researcher tells me that they are not allowed to email me their code. So, he’s bringing his laptop to me and will sit next to me for a few hours while I try to figure out if I can help or not. Such is the lot of a working research software engineer.
Along with organisations such as the Sheffield Open Data Science Initiative and The Software Sustainability Institute, I am trying to improve this state of affairs but have to admit that progress is slower than I’d like.
These steps won’t guarantee that your code is correct but they are great steps in the right direction. For more in-depth advice, I refer you to Greg Wilson’s paper Best Practices for Scientific Computing.
The ever-superb John D. Cook recently found this lovely looking curve in a book he’s currently reading
John posted some Python code that reproduced this curve. I stole borrowed his code, put it in a Jupyter notebook and wrapped it in an interactive widget to allow me to play with the parameters and see what other curves I could come up with. The result looks like this.

If you’d like something where those sliders work, you need to run the notebook I’ve created in Project Jupyter. Here are 2 ways to do that.
- Download the notebook from github
- Method 1: Upload this notebook to Try Jupyter.
- Method 2: Install Anaconda Python on your machine. Launch the notebook and open the file downloaded above.
Once you have the notebook open, click on Cell->Run All and play with the sliders that pop up.
Other posts about these curves:
- Random cyclic curves – Includes code written in Haskell
- A geogebra applet
I recently found myself in need of a portable install of the Jupyter notebook which made use of a portable install of R as the compute kernel. When you work in institutions that have locked-down managed Windows desktops, such portable installs can be a life-saver! This is particularly true when you are working with rapidly developing projects such as Jupyter and IRKernel.
It’s not perfect but it works for the fairly modest requirements I had for it. Here are the steps I took to get it working.
Download and install Portable Python
I downloaded Portable Python 2.7.6.1 from http://portablepython.com/ and installed into a directory called Portable Python 2.7.6.1
Update IPython and install the extra modules we need
This version of Portable Python comes with a portable IPython instance but it is too old to support alternative kernels. As such, we need to install a newer version.
Open a cmd.exe command prompt and navigate to Portable Python 2.7.6.1\App\Scripts.
Enter the command
easy_install ipython.exe
You’ll now find that you can launch the ipython.exe terminal from within this directory:
C:\Users\walkingrandomly\Desktop\Portable Python 2.7.6.1\App\Scripts>ipython
Python 2.7.6 (default, Nov 10 2013, 19:24:18) [MSC v.1500 32 bit (Intel)]
Type "copyright", "credits" or "license" for more information.

IPython 3.1.0 -- An enhanced Interactive Python.
?         -> Introduction and overview of IPython's features.
%quickref -> Quick reference.
help      -> Python's own help system.
object?   -> Details about 'object', use 'object??' for extra details.

In [1]: exit()
If you try to launch the notebook, however, you’ll get error messages. This is because we haven’t taken care of all the dependencies. Let’s do that now. Ensuring you are still in the Portable Python 2.7.6.1\App\Scripts folder, execute the following commands.
easy_install pyzmq
easy_install jinja2
easy_install tornado
easy_install jsonschema
You should now be able to launch the notebook using
ipython notebook
Install portable R and IRKernel
- I downloaded Portable R 3.2 from http://sourceforge.net/projects/rportable/files/ and installed into a directory called R-Portable
- Move this directory into the Portable Python directory. It needs to go inside Portable Python 2.7.6.1\App (see this discussion to learn how I discovered that this location was the correct one)
- Launch the Portable R executable which should be at Portable Python 2.7.6.1\App\R-Portable\R-portable.exe and install the IRKernel packages by doing
install.packages(c("rzmq","repr","IRkernel","IRdisplay"), repos="http://irkernel.github.io/")
Install additional R packages
The version of Portable R I used didn’t include various necessary packages. Here’s how I fixed that.
- Launch the Portable R executable which should be at Portable Python 2.7.6.1\App\R-Portable\R-portable.exe and install the following packages
install.packages('digest')
install.packages('uuid')
install.packages('base64enc')
install.packages('evaluate')
install.packages('jsonlite')
Install the R kernel file
Create the directory structure Portable Python 2.7.6.1\App\share\jupyter\kernels\R_kernel
Create a file called kernel.json that contains the following
{"argv": ["R-Portable/App/R-Portable/bin/i386/R.exe","-e","IRkernel::main()",
"--args","{connection_file}"],
 "display_name":"Portable R"
}
This file needs to go in the R_kernel directory created earlier. Note that the kernel location specified in kernel.json uses Linux style forward slashes in the path rather than the backslashes that Windows users are used to. I found that this was necessary for the kernel to work –it was ignored by the notebook otherwise.
Finishing off
Everything created so far, including R, is in the folder Portable Python 2.7.6
I created a folder called PortableJupyter and put the Portable Python 2.7.6 folder inside it. I also created the folder PortableJupyter\notebooks to allow me to carry my notebooks around with the software that runs them.
There is a bug in Portable Python 2.7.6.1 relating to scripts like IPython.exe that have been installed using easy_install. In short, they stop working if you move the directory they’re installed in – breaking portability somewhat! (Details here)
The workaround is to launch Ipython by running the script Portable Python 2.7.6.1\App\Scripts\ipython-script.py
I didn’t want to bother with that so created a shortcut in my PortableJupyter folder called Launch notebook. The target of this shortcut was the following line
%windir%\system32\cmd.exe /c "cd notebooks && "%CD%/Portable Python 2.7.6.1/App\python.exe" "%CD%/Portable Python 2.7.6.1\App\Scripts\ipython-script.py" notebook"
This starts the notebook using the default web browser and puts you in the notebooks directory.
The pay off
My folder looks like this:

If I click on the Launch Notebook shortcut, I get a Jupyter session with 2 kernel options
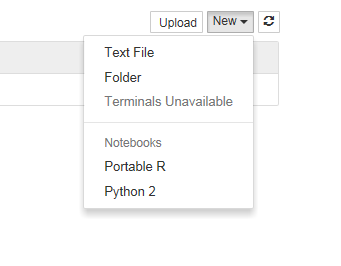
I can choose the Portable R kernel and start using R in the notebook!

I’ve been working at The University of Manchester for almost a decade and will be leaving at the end of this week! A huge part of my job was to support a major subset of Manchester’s site licensed application software portfolio so naturally I’ve made use of a lot of it over the years. As of February 20th, I will no longer be entitled to use any of it!
This article is the second in a series where I’ll look at some of the software that’s become important to me and what my options are on leaving Manchester. Here, I consider MATLAB – a technical computing environment that has come to dominate my career at Manchester. For the last 10 years, I’ve used MATLAB at least every week, if not most days.
I had a standalone license for MATLAB and several toolboxes – Simulink, Image Processing, Parallel Computing, Statistics and Optimization. Now, I’ve got nothing! Unfortunately for me, I’ve also got hundreds of scripts, mex files and a few Simulink models that I can no longer run! These are my options:
Go somewhere else that has a MATLAB site license
- I’ll soon be joining the University of Sheffield who have a MATLAB site license. A great option if you can do it.
Use something else
- Octave – Octave is a pretty good free and open source clone of MATLAB and quite a few of my programs would work without modification. Others would require some rewriting and, in some cases, that rewriting could be extensive! There is no Simulink support.
- Scilab – It’s free and it’s MATLAB-like-ish but I’d have to rewrite my code most of the time. I could also port some of my Simulink models to Scilab as was done in this link.
- Rewrite all my code to use something completely different. What I’d choose would depend on what I’m trying to achieve but options include Python, Julia and R among others.
Compile!
- If all I needed was the ability to run a few MATLAB applications I’d written, I could compile them using the MATLAB Compiler and keep the result. The whole point of the MATLAB Compiler is to distribute MATLAB applications to those who don’t have a MATLAB license. Of course once I’ve lost access to MATLAB itself, debugging and adding features will be um……tricky!
Get a hobbyist license for MATLAB
- MATLAB Home – This is the full version of MATLAB for hobbyists. Writing a non-profit blog such as WalkingRandomly counts as a suitable ‘hobby’ activity so I could buy this license. MATLAB itself for 85 pounds with most of the toolboxes coming in at an extra 25 pounds each. Not bad at all! The extra cost of the toolboxes would still lead me to obsess over how to do things without toolboxes but, to be honest, I think that’s an obsession I’d miss if it weren’t there! Buying all of the same toolboxes as I had before would end up costing me a total of £210+VAT.
- Find a MOOC that comes with free MATLAB – Mathworks make MATLAB available for free for students of some online courses such as the one linked to here. Bear in mind, however, that the license only lasts for the duration of the course.
Academic Use
If I were to stay in academia but go to an institution with no MATLAB license, I could buy myself an academic standalone license for MATLAB and the various toolboxes I’m interested in. The price lists are available at http://uk.mathworks.com/pricing-licensing/
For reference, current UK academic prices are
- MATLAB £375 + VAT
- Simulink £375 + VAT
- Standard Toolboxes (statistics, optimisation, image processing etc) £150 +VAT each
- Premium Toolboxes (MATLAB Compiler, MATLAB Coder etc) – Pricing currently not available
My personal mix of MATLAB, Simulink and 4 toolboxes would set me back £1350 + VAT.
Commercial Use
If I were to use MATLAB professionally and outside of academia, I’d need to get a commercial license. Prices are available from the link above which, at the time of writing, are
- MATLAB £1600 +VAT
- Simulink £2400 + VAT
- Standard Toolboxes £800 +VAT each
- Premium Toolboxes – Pricing currently not available
My personal mix of MATLAB, Simulink and 4 toolboxes would set me back £7200 + VAT.
Contact MathWorks
If anyone does find themselves in a situation where they have MATLAB code and no means to run it, then they can always try contacting MathWorks and ask for help in finding a solution.
Wakelet is a new content curation platform that I’ve been playing with recently and I have to say, I like it a lot! Here’s a screenshot from one of my wakes, ‘Best of WalkingRandomly’ where I’ve gathered together some of the most popular pages here.

A ‘wake’ is a collection of images, notes, comments and links. It sounds simple, and it is, but I’ve found it very useful for all kinds of stuff. For example, whenever I find an interesting article about scientific computing, I usually post it on my twitter feed – https://twitter.com/walkingrandomly. I’ve done this for hundreds of links but they are difficult to subsequently look up. With this in mind, I’ve started adding some of the best links to my Scientific Computing wake.

Wakelet is developed by a group in Manchester and I first learned about it because one of my friends is a developer there. At first, I dutifully played with it because of his involvement but I’ve continued using it’s really rather good! Read more about wakelet:
The Mathematics department at The University of Manchester runs a third year undergraduate module called ‘Problem solving by computer’ which invites students to solve complex mathematical problems by doing a little programming. Along with some interesting mathematics, the course exposes students to a wide variety of languages and numerical libraries including MATLAB, Octave, NAG, Mathematica and, most recently, Python.
Earlier this year, Python was introduced as an option for students who wanted to use it for a project in this course and, despite only being given two lectures in the language, quite a few people chose to use it. Much of this success must be attributed to the Python for MATLABers notes written by Manchester PhD student, Sophia Coban which is why I’m providing links to them here.
I work at The University of Manchester as part of IT Service’s Research Support department. This month, I was given the task of editing the newsletter that we send out to the academics we serve.
For me, this month’s highlights include the fact that our Condor Pool (which I help build and run) has now delivered over 20 million CPU hours to academics at Manchester by making use of desktop PCs around campus. Another HPC system we have at Manchester is our Computational Shared Facility which is jointly funded by the University and all of the research groups who use it. This system has just seen the installation of its 6000-th CPU core.
Other news includes the Greater Manchester Data Dive, an AGM for Research Software Engineers, Image based modelling and more.
If you are interested in seeing the sort of thing we get up to, check out this months newsletter at http://documents.manchester.ac.uk/DocuInfo.aspx?DocID=20995
Update: September 2014 – The notes in this blog post have been uploaded to github: https://github.com/mikecroucher/Windows_Scientific_Computing. The blog post will be kept as-is for posterity reasons. For the most up to date version of the notes, see the github version.
Some time in 2013, I helped out at a Software Carpentry event at The University of Bath. As with most software carpentry boot camps, one of the topics covered was shell scripting and the scripting language of choice was bash. As I wandered around the room, I asked the delegates which operating system they use for the majority of their research and the most popular answer, by far, was Windows.
This led me to wonder if we should teach using a native Windows solution rather than relying on bash?
A few years ago, this would be an insane proposition since the Windows command shell is very weak compared to bash. PowerShell, on the other hand, is modern, powerful and installed on all modern Windows operating systems by default.
My problem was that I didn’t know PowerShell very well. So, I took the notes for the 2013 Bath shell scripting session – https://github.com/swcarpentry/boot-camps/tree/2013-07-bath/shell – and gave myself the exercise of converting them to PowerShell.
I got close to completing this exercise last summer but various things took higher priority and so the project languished. Rather than sit on the notes any longer, I’ve decided to just publish what I have so far in case they are useful to anyone.
You are free to use them with the following caveats
- This is not necessarily the right way to teach PowerShell. It is an experiment in converting some classroom-tested Linux based notes to PowerShell.
- If you use them, attribution would be nice. I am Mike Croucher, my site is www.walkingrandomly.com Details on how to contact me at https://www.walkingrandomly.com/?page_id=2055
- I have not yet tested these notes in a classroom situation
- These notes aren’t finished yet
- These notes have been developed and tested on Windows 7. Behaviour may be different using different versions of Windows.
- These notes are given as they were left sometime in mid 2013. Some things may be out of date.
- I was learning PowerShell as I developed these notes. As such, I fully expect them to be full of mistakes. Corrections and improvements would be welcomed.
If anyone is interested in developing these notes into something that’s classroom-ready, contact me.
The old Windows Command Shell
The traditional Windows command shell is a program called cmd.exe which can trace its roots all the way back to the old, pre-Windows DOS prompt.
You can launch this command shell as follows
- Hold down both the Windows button and the letter R to open the Run prompt
- Type cmd and press Enter or click OK
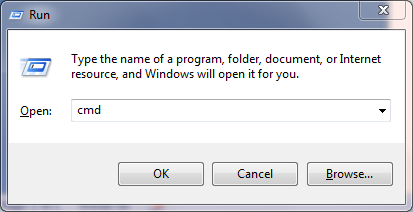
- You should see a window similar to the one below
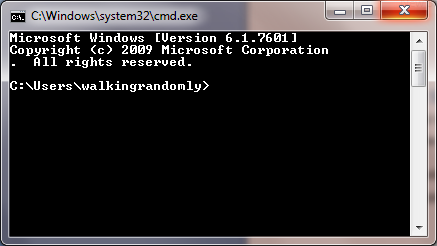
The Windows command shell hasn’t changed significantly for over twenty years and is relatively feature poor compared to more modern shells. For this reason, it is recommended that you use Windows PowerShell instead. Mention of cmd.exe is only included here since, despite its deficiencies, it is still widely in use
PowerShell
To launch PowerShell:
- Hold down both the Windows button and the letter R to open the Run prompt
- Type powershell and press Enter or click OK
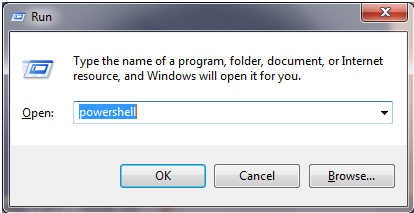
- You should see a window similar to the one below
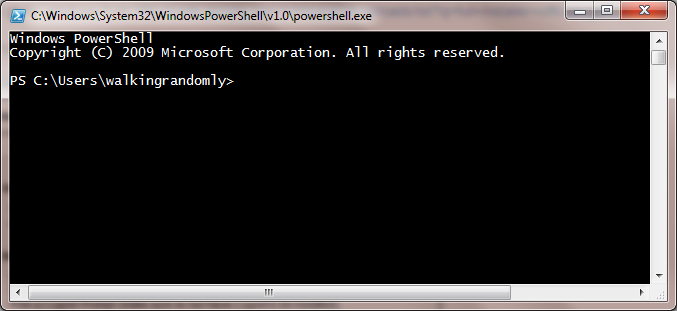
Note that although the header of the above window mentions v1.0, it could be a screenshot from either version 1.0 or version 2.0. This is a well-known bug. If you are using Windows 7 you will have version 2 at the minimum.
PowerShell versions
At the time of writing, PowerShell is at version 3. Ideally, you should at least have version 2.0 installed. To check version:
$psversiontable.psversion

Major  Minor  Build  Revision
-----  -----  -----  --------
3      0      -1     -1
If this variable does not exist, you are probably using version 1.0 and should upgrade.
Version 3.0 is available at http://blogs.technet.com/b/heyscriptingguy/archive/2013/06/02/weekend-scripter-install-powershell-3-0-on-windows-7.aspx
Comments
# This is a comment in Powershell. It is not executed
Directories
Users of Bash will feel right at home at first since PowerShell appears to have the same set of commands
pwd                         #Path to current folder
ls                          #List directory
ls *.txt                    #Wild Card
ls *_hai*
ls -R                       #Recursive folder listing
ls .                        #List current folder
ls ..                       #List Parent folder
cd ..                       #Change current folder to parent. (Move up a folder)
cd ~                        #Change current folder to your user directory.
mkdir myfolder              #Create a folder
mkdir ~/myfolder
mv myfolder new_myfolder    #rename myfolder to new_myfolder
rm -r new_myfolder          #Delete new_myfolder if its empty
Files
cat file                    # View file
more file                   # Page through file
cat file | select -first 3  # first N lines
cat file | select -last 2   # Last N lines
cp file1 file2              # Copy
cp *.txt directory
rm file.txt                 # Delete - no recycle bin.
rm -r directory             # Recurse
Different command types in PowerShell: Aliases, Functions and Cmdlets
Many of the PowerShell ‘commands’ we’ve used so far are actually aliases to Powershell Cmdlets which have a Verb-Noun naming convention. We can discover what each command is an alias of using the get-alias cmdlet.
PS > get-alias ls

CommandType     Name                                                Definition
-----------     ----                                                ----------
Alias           ls                                                  Get-ChildItem
This shows that ls is an alias for the Cmdlet Get-ChildItem
A list of aliases for common Bash commands:
- cat (Get-Content)
- cd (Set-Location)
- ls (Get-ChildItem)
- pwd (Get-Location)
One reason why aliases were created is to make PowerShell a more familiar environment for users of other shells such as the old Windows cmd.exe or Linux’s Bash environment and also to save on typing.
You can get a list of all aliases using get-alias on its own.
PS > get-alias
Finally, here’s how you get all of the aliases for the Get-ChildItem cmdlet.
get-alias | where-object {$_.Definition -match "Get-Childitem"}
For more details on Powershell aliases, see Microsoft’s documentation at http://technet.microsoft.com/en-us/library/ee692685.aspx
What type of command is mkdir?
The mkdir command looks like it might be an alias as well since it doesn’t have the verb-noun naming convention of Cmdlets. Let’s try to see which Cmdlet it might be an alias of:
PS > get-alias mkdir

Get-Alias : This command cannot find a matching alias because alias with name 'mkdir' do not exist.
At line:1 char:6
+ alias <<<<  mkdir
    + CategoryInfo          : ObjectNotFound: (mkdir:String) [Get-Alias], ItemNotFoundException
    + FullyQualifiedErrorId : ItemNotFoundException,Microsoft.PowerShell.Commands.GetAliasCommand
It turns out that mkdir isn’t an alias at all but is actually yet another PowerShell command type, a function. We can see this by using the get-command Cmdlet
PS > get-command mkdir
CommandType     Name                                                Definition
-----------     ----                                                ----------
Function        mkdir                                               ...
Application     mkdir.exe                                           C:\Program Files (x86)\Git\bin\mkdir.exe
Now we can clearly see that mkdir is a PowerShell function. The mkdir.exe is an Application which you’ll only see if you installed git for windows as I have.
Cmdlets
A Cmdlet (pronounced ‘command-let’) is a .NET class but you don’t need to worry abut what this means until you get into advanced PowerShell usage. Just think of Cmdlets as the base type of PowerShell command. They are always named according to the convention verb-noun; for example Set-Location and Get-ChildItem.
Listing all Cmdlets
The following lists all Cmdlets
Get-Command
You can pipe this list to a pager
Get-Command | more
Getting help
You can get help on any PowerShell command using the -? switch. For example
ls -?
When you do this, you’ll get help for the Get-ChildItem Cmdlet which would be confusing if you didn’t know that ls is actually an alias for Get-ChildItem
History
Up arrow browses previous commands.
By default, PowerShell version 2 remembers the last 64 commands whereas PowerShell version 3 remembers 4096. This number is controlled by the $MaximumHistoryCount variable
PS > $MaximumHistoryCount           #Display the current value
PS > $MaximumHistoryCount=150       #Change it to 150
PS > history                        #Display recent history using the alias version of the command
PS > get-history                    #Display recent history using the Cmdlet direct
Although it remembers more, PowerShell only shows the last 32 commands by default. To see a different number, use the count switch
PS > get-history -count 50
To run the Nth command in the history use Invoke-History
PS > invoke-history 7
Word count (and more) using Measure-Object
Linux has a command called wc that counts the number of lines and words in a file. Powershell has no such command but we can do something similar with the Measure-Object Cmdlet.
Say we want to count the number of lines, words and characters in the file foo.txt. The first step is to get the content of the file
get-content foo.txt # gets the content of foo.txt
Next, we pipe the result of the get-content Cmdlet to Measure-Object, requesting lines, words and characters
get-content foo.txt | measure-object -line -character -word
The measure-object Cmdlet can also count files
ls *.txt | measure-object #Counts number of .txt files in the current folder
When you execute the above command, a table of results will be returned:
Count    : 3
Average  :
Sum      :
Maximum  :
Minimum  :
Property :
This is because the measure-object Cmdlet, like all PowerShell Cmdlets, actually returns an object and the above table is the textual representation of that object.
The fields in this table hint that measure-object can do a lot more than simply count things. For example, here we find some statistics concerning the file lengths found by the ls *.txt command
ls *.txt | measure-object -property length -minimum -maximum -sum -average
You may wonder exactly what type of object has been returned from measure-object and we can discover this by running the gettype() method of the returned object
(ls *.txt | measure-object).gettype()
Request just the name as follows
(ls *.txt | measure-object).gettype().Name

GenericMeasureInfo
To find out what properties an object has, pass it to the get-member Cmdlet
#Return all member types
ls *.txt | get-member

#Return only Properties
ls *.txt | get-member -membertype property
Sometimes, you’ll want to simply return the numerical value of an object’s property and you do this using the select-object Cmdlet. Here we ask for just the Count property of the GenericMeasureInfo object returned by measure-object.
#Counts the number of *.txt files and returns just the numerical result
ls *.txt | measure-object | select-object -expand Count
Searching within files
The Unix world has grep, PowerShell has Select String. Try running the following on haiku.txt
Select-String the haiku.txt                             #Case insensitive by default, unlike grep
Select-String the haiku.txt -CaseSensitive              #Behaves more like grep
Select-String day haiku.txt -CaseSensitive
Select-String is haiku.txt -CaseSensitive
Select-String 'it is' haiku.txt -Casesensitive
There is no direct equivalent to grep’s -w switch.
grep -w is haiku.txt #exact match
However, you can get the same behaviour using the word boundary anchors, \b
Select-String \bis\b haiku.txt -casesensitive
Grep has a -v switch that shows all lines that do not match a pattern. Select-String makes use of the -notmatch switch.
BASH: grep -v "is" haiku.txxt
PS: select-string -notmatch "is" haiku.txt -CaseSensitive
Grep has an -r switch which stands for ‘recursive’. The following will search through all files and subfolders of your current directory, looking for files that contain is
grep -r is *
Select-String has no direct equivalent to this. However, you can do the same thing by using get-childitem to get the list of files, piping the output to select-string
get-childitem * -recurse | select-string is
One difference between grep and Select-String is that the latter includes the filename and line number of each match.
grep the haiku.txt

Is not the true Tao, until
and the presence of absence:

Select-String the haiku.txt -CaseSensitive

haiku.txt:2:Is not the true Tao, until
haiku.txt:6:and the presence of absence:
To get the grep-like output, use the following
Select-String the haiku.txt -CaseSensitive | ForEach-Object {$_.Line}

Is not the true Tao, until
and the presence of absence:
To understand how this works, you first have to know that Select-String returns an array of MatchInfo objects when there is more than one match. To demonstrate this:
$mymatches = Select-String the haiku.txt -CaseSensitive  #Put all matches in the variable 'mymatches'
$mymatches -is [Array]          #query if 'match' is an array

True
So, mymatches is an array. We can see how many elements it has using the array’s Count property
$mymatches.Count

2
The type of elements in PowerShell arrays don’t necessarily have to be the same. In this case, however, they are.
$mymatches[0].gettype()
$mymatches[1].gettype()
both of these give the output
IsPublic IsSerial Name                                     BaseType
-------- -------- ----                                     --------
True     False    MatchInfo                                System.Object
If all you wanted was the name of the first object type, you’d do
$mymatches[0].gettype().name

MatchInfo
Alternatively, we could have asked for each element’s type using the For-Each-Object Cmdlet to loop over every object in the array.
$mymatches | Foreach-Object {$_.gettype().Name}
Where $_ is a special variable that effectively means ‘current object’ or ‘The object currently being considered by Foreach-Object’ if you want to be more verbose.
So, we know that we have an array of 2 MatchInfo objects in our variable mymatches. What does this mean? What properties do MatchInfo objects have? We can find out by piping one of them to the Get-Member Cmdlet.
$mymatches[0] | Get-Member

   TypeName: Microsoft.PowerShell.Commands.MatchInfo

Name         MemberType Definition
----         ---------- ----------
Equals       Method     bool Equals(System.Object obj)
GetHashCode  Method     int GetHashCode()
GetType      Method     type GetType()
RelativePath Method     string RelativePath(string directory)
ToString     Method     string ToString(), string ToString(string directory)
Context      Property   Microsoft.PowerShell.Commands.MatchInfoContext Context {get;se
Filename     Property   System.String Filename {get;}
IgnoreCase   Property   System.Boolean IgnoreCase {get;set;}
Line         Property   System.String Line {get;set;}
LineNumber   Property   System.Int32 LineNumber {get;set;}
Matches      Property   System.Text.RegularExpressions.Match[] Matches {get;set;}
Path         Property   System.String Path {get;set;}
Pattern      Property   System.String Pattern {get;set;}
Now we can see that each MatchInfo object has a Line property and it’s reasonable to guess that this contains a Line containing a match. Taking a look:
$mymatches[0].Line

Is not the true Tao, until
Bringing together everything we’ve seen so far, we pull out the Line property of each element in the array as follows
$mymatches | Foreach-Object {$_.Line}
Alternatively, we can ditch the $mymatches variable and pipe in the output of Select-String directly
Select-String the haiku.txt -CaseSensitive | ForEach-Object {$_.Line}

Is not the true Tao, until
and the presence of absence:
Regular expressions
select-string 's*is' haiku.txt        # * Zero or more of preceding token
select-string 's+is' haiku.txt        # + On or more of preceding token
select-string '.nd'  haiku.txt        # . Any token followed by 'nd'
select-string 'es'   haiku.txt        # matches 'es'
select-string 'es[ht]' haiku.txt      # Exactly one of the characters listed
select-string 'es[^ht]' haiku.txt     # Matches everything except h and t
select-string 'ex[
select-string '\bis\b' haiku.txt      # \b word boundaries
Input and output redirection
> redirects output (AKA standard output). This works in both Bash and Powershell scripts. For example, in Bash we might do
#BASH
grep -r not * > found_nots.txt
Drawing on what we’ve learned so far, you might write the PowerShell version of this command as
#PS
get-childitem *.txt -recurse | select-string not > found_nots.txt
However, if you do this, you will find that the script will run forever with the hard-disk chugging like crazy. If you’ve run the above command, CTRL and C will stop it. This is because Powershell is including the output file, found_nots.txt, in its input which leads to an infinite loop. To prevent this, we must explicitly exclude the output file from the get-childitem search
get-childitem *.txt -Exclude 'found_nots.txt' -recurse | select-string not > found_nots.txt

cat found_nots.txt
ls *.txt > txt_files.txt
cat txt_files.txt
In Linux, < redirects input (AKA standard input). This does not work in PowerShell:
cat < haiku.txt
At line:1 char:5
+ cat < haiku.txt
+     ~
The '<' operator is reserved for future use.
    + CategoryInfo          : ParserError: (:) [], ParentContainsErrorRecordException
    + FullyQualifiedErrorId : RedirectionNotSupported
The above is a forced use of < since one could simply do
cat haiku.txt
Recall that cat is an alias for get-content. The use of get-content is an idiom that gets around the lack an < operator. For example, instead of
foo < input.txt
One does
get-content input.txt | foo
Error messages are output on standard error
ls idontexist.txt > output.txt
cat output.txt                  #output.txt is empty
ls idontexist.txt 2> output.txt               # 2 is standard error
ls haiku.txt 1> output.txt                    # 1 is standard output
ls haiku.txt,test_file.txt 2>&1 > output.txt  # Combine the two streams.
Searching for files
# Find all
UNIX: find .
PS: get-childitem .  -Recurse
PS: get-childitem .  -Recurse | foreach-object {$_.FullName}    #To give identical output as `find`
To save on typing, you can use the alias gci instead of get-childitem
# Directories only
UNIX: find . -type d
PS2: gci . -recurse | where { $_.PSIsContainer }
PS3: gci -recurse -Directory
If you have PowerShell 2, you can only use the long winded version. It’s simpler in PowerShell 3. Similarly for searching for files only.
# Files only
UNIX: find . -type f
PS2: get-childitem -recurse | where { ! $_.PSIsContainer }
PS3: gci -recurse -File
With the Unix find command, you can specify the maximum and minimum search depths. There is no direct equivalent in PowerShell although you could write a function that will do this. Such a function can be found at http://windows-powershell-scripts.blogspot.co.uk/2009/08/unix-linux-find-equivalent-in.html although I have not tested this!
# Maximum depth of tree
UNIX: find . -maxdepth 2
PS : No direct equivalent
# Minimum depth of tree
UNIX: find . -mindepth 3
PS : No direct equivalent
You can also filter by name. Confusingly, PowerShell offers two ways of doing this. More details on the differences between these can be found at http://tfl09.blogspot.co.uk/2012/02/get-childitem-and-theinclude-and-filter.html
One key difference between find and get-childitem is that the latter is case-insenstive whereas find is case sensitive.
# Find by name
UNIX: find . -name '*.txt'
PS: gci -recurse -include *.txt
PS: gci -recurse -filter *.txt

#Find empty files
UNIX: find . -empty
PS: gci -recurse | where ($_.Length -eq 0) | Select FullName

#Create empty file
UNIX: touch emptyfile.txt
PS: new-item emptyfile.txt -type file
Command Substituion
In bash, you can execute a command using backticks and the result is substituted in place. i.e.
#bash
foo `bar`
The backticks are used as escape characters in PowerShell so you do the following instead
#PS
foo $(bar)
In both cases, the command bar is executed and result is substituted into the call to foo.
Power of the pipe
| is a pipe. Use the pipe to connect the output of one command to the input of another:
Count text files
ls -filter *.txt | measure
ls outputs a list of files, measure inputs a list of files.
echo "Number of .txt files:"; ls -filter *.txt | measure | select -expand count
; equivalent to running two commands on separate lines.
Question: what does this do?
ls -name | select-string s | measure
Answer: counts the number of files with s in their name.
history | select-string 'echo'
Power of well-defined modular components with well-defined interfaces,
- Bolt together to create powerful computational and data processing workflows.
- Good design principle applicable to programming – Python modules, C libraries, Java classes – modularity and reuse.
- “little pieces loosely joined” –
history+select-string= function to search for a command.
Variables
get-variable                            # See all variables
$MYFILE="data.txt"                      # Need quotes around strings
echo $MYFILE
echo "My file name is $MYFILE"
$num = 1                                #Numbers don't need quotes
$num = $num+1                           #Simple Arithmetic
$TEXT_FILES=get-childitem               Save output of get-childitem
echo $TEXT_FILES
Variables only persist for the duration of the current PowerShell Session
Environment variables
Windows environment variables don’t show up when you execute get-variable; to list them all you do
#PS
get-childitem env:                  #Show all Windows Environment variables
echo $env:PATH                      #Show the contents of PATH
$env:Path = $env:Path + ";C:\YourApp\bin\"  #temporarily add a folder to PATH
This modification to PATH will only last as long as the current session. It is possible to permanently modify the system PATH but this should only be done with extreme care and is not covered here.
PowerShell Profile
The PowerShell profile is a script that is executed whenever you launch a new session. Every user has their own profile. The location of your PowerShell profile is defined by the variable $profile
$profile
Open it with
notepad $profile
Add something to it such as
echo "Welcome to PowerShell. This is a message from your profile"
Restart PowerShell and you should see the message. You can use this profile to customise your PowerShell sessions. For example, if you have installed NotePad++, you might find adding the following function to your PowerShell Profile to be useful.
# Launch notepad++ using the npp command
function npp($file)
{
if ($file -eq $null)
    {
        & "C:\Program Files (x86)\Notepad++\notepad++.exe";
    }
    else
    {
        & "C:\Program Files (x86)\Notepad++\notepad++.exe" $file;
    }
}
With this function in your profile, you can open Notepad++ with the command npp or npp(filename.txt)
Conditionals
$num = 1
if($num -eq 1)
{
  write-host 'num equals 1'
}

$word="hello"
if($word -eq "hello")
{
  write-host 'The same'
}
By default, string tests are case insensitive
$word="hello"
if($word -eq "HELLO")
{
  write-host 'The same'
}
To force them to be case sensitive, add a c to the operator:
$word="hello"
if($word -ceq "HELLO")
{
  write-host 'The Same. This won't be printed'
}
You can similarly be explicitly case insensitive by adding an i. Although this is the the same behaviour as the undecorated operators and so might seem unnecessary, it shows your intent to the reader.
    $word="hello"
    if($word -ieq "HELLO")
    {
      write-host 'The same'
    }
Comparison Operators
-eq Equal to
-lt Less than
-gt Greater than
-ge Greater than or equal to
-le Less than or equal to
-ne Not equal to
Logical operators
-not    Not
!       Not
-or     Or
-and    And
Loops
PowerShell has several looping constructs. Here, I only consider two.
for
Allows you to run a block of code a set number of times.
for ($i=1; $i -le 5; $i=$i+1)
{
   Write-Host $i
}
foreach
Do something with every element of a collection
foreach($item in $(ls *.txt)) {echo $item.Name}
foreach vs foreach-object
TODO
Shell scripts
- Save retyping.
- PowerShell scripts have the extension .ps1
- PowerShell scripts must be created with plain text editors such as Notepad or Notepad++. NEVER use Microsoft Word!
Here is a very simple script
notepad protein_filter.ps1                  #Open the file

#A simple protein filter
$DATE = get-date
echo "Processing date: $DATE"

foreach($item in get-childitem *.pdb)
{
   echo $item.Name
}

echo "Processing complete"
To run this just type the filename:
protein_filter.ps1
If you get an error message, it may be because your execution policy is set not to run scripts locally. Change this with the command
Set-ExecutionPolicy RemoteSigned            #Allow local scripts to run.  Needs to be run with admin privileges
protein_filter.ps1                          #Run the script
Download files via command-line
Primary Care Trust Prescribing Data – April 2011 onwards
$file="prim-care-trus-pres-data-apr-jun-2011-dat.csv"
$path="$pwd\$file"   #Path needs to be fully qualified. This puts it in the current folder
$url = "http://www.ic.nhs.uk/catalogue/PUB02342/$file"
$client = new-object System.Net.WebClient
$client.DownloadFile( $url, $path )
Permissions
Windows file permissions are rather more complicated than those of Linux but most users won’t need to worry about them in day to day use.
The call operator
It is sometimes convenient to construct strings that contain the full path to a PowerShell script we want to execute. For example:
$fullpath = "$pwd\myscript.ps1"
To actually run the script pointed to by this variable, you need to use the call operator &
& $fullpath #Runs myscript.ps1
You also need to do this if you try to call any script where the path contains spaces
"C:\Program Files\myscript.ps1"             #Will just display the string literal
& "C:\Program Files\myscript.ps1"           #Runs the script
Background Jobs
Consider the script counter.ps1
param($step=1)
#counter.ps1: A simple, long running job to demonstrate background jobs

$i=1

while ( $i -lt 200000 )
{
    echo $i
    $i=$i+$step
}
This counts up to 200000 in user-defined steps.
./counter.ps1   > 1step.txt                 #Counts in steps of 1
./counter.ps1 -step 2 > 2step.txt           #Counts in steps of 2
The script takes quite a while to complete and you cannot do anything else in your PowerShell session while it is working. Using the start-job Cmdlet, we can run counter.ps1 in the background
start-job -scriptblock { C:\Users\walkingrandomly\Dropbox\SSI_Windows\dir_full_of_files\some_directory\counter.ps1 > C:\Users\walkingrandomly\Dropbox\SSI_Windows\dir_full_of_files\some_directory\outcount1.txt }
Note that you have to use the full path to both the counter.ps1 script and the output file. You can see the status of the job with get-job
get-job

Id              Name            State      HasMoreData     Location             Command
--              ----            -----      -----------     --------             -------
1              Job1             Running    True            localhost             C:\Users\walkingrando...
Eventually, your job will complete
get-job

Id              Name            State      HasMoreData     Location             Command
--              ----            -----      -----------     --------             -------
1               Job1            Completed  False           localhost             C:\Users\walkingrando...

ls outcount*                    #Ensure that output file has been created
remove-job 1                    #remove remnants of job 1 from the queue
get-job                         #Check that queue is empty
You can run as many simultaneous jobs as you like but it is best not to run too many or your computer will grind to a halt.
Here’s an example that runs 5 counter.ps1 jobs concurrently
#parallel_counters.ps1
#Runs 5 instances of counter.ps1 in parallel

$scriptname     = "counter.ps1"
$outputfileBase = "outfile"
$outputfileExt  = ".txt"

$scriptPath = "$pwd\$scriptname"

for ($i=1; $i -le 5; $i++)
{
  $outputfilePath = "$pwd\$outputfileBase" + $i + $outputfileExt
  $command = "$scriptPath -step $i `> $outputfilePath"
  $myScriptBlock = [scriptblock]::Create($command)
  start-job -scriptblock $myScriptBlock
}
Run this as a demonstration
parallel_counters.ps1
get-job                             #Keep running until all have completed
ls outfile*
more outfile5.txt
more outfile2.txt
$myjob=get-job 2                    #Get info on job Id 2 and store in variable $myjob
$myjob.Command                      #Look at the command that comprised job 2
remove-job *                        #Remove all job remnants from the queue
get-job                             #Should be empty
TODO: Dealing with output, recieve-job
Secure Shell
There is no equivalent to the Linux commands ssh and sftp in PowerShell. The following free programs are recommended
- http://www.chiark.greenend.org.uk/~sgtatham/putty/ – PuTTY is a free implementation of Telnet and SSH for Windows and Unix platforms.
- http://winscp.net/eng/index.php – Free SFTP, SCP and FTP client for Windows.
- http://mobaxterm.mobatek.net/ – A more advanced terminal than PuTTY with a free ‘personal edition’ and a paid-for ‘professional edition’
Packaging
There are no direct PowerShell equivalents to zip, unzip, tar etc. There are write-zip, write-tar and write-gzip cmdlets in the third party, free PowerShell Community Extensions but I have not investigated them yet.
Transcripts
Start-transcript Initializes a transcript file which records all subsequent input/Output. Use the following syntax:
Start-Transcript [[-path] FilePath] [-force] [-noClobber] [-append]
Stop-transcript Stops recording and finalizes the transcript.
start-transcript -path ./diary.txt
ls
echo "Hello dear diary"
stop-transcript
cat diary.txt
- Record commands typed, commands with lots of outputs, trial-and-error when building software.
- Send exact copy of command and error message to support.
- Turn into blog or tutorial.
Shell power
(Bentley, Knuth, McIlroy 1986) Programming pearls: a literate program Communications of the ACM, 29(6), pp471-483, June 1986. DOI: [10.1145/5948.315654].
Dr. Drang, More shell, less egg, December 4th, 2011.
Common words problem: read a text file, identify the N most frequently-occurring words, print out a sorted list of the words with their frequencies.
10 plus pages of Pascal … or … 1 line of shell
#BASH version
$ nano words.sh
tr -cs A-Za-z '\n' | tr A-Z a-z | sort | uniq -c | sort -rn | sed ${1}q
$ chmod +x words.sh
$ nano words.sh < README.md
$ nano words.sh < README.md 10
The PowerShell version is more complicated but still very short compared to the 10 pages of Pascal
#count_words.ps1
Param([string]$filename,[int]$num)
$text=get-content $filename
$split = foreach($line in $text) {$line.tolower() -split "\W"}
$split | where-object{-not [string]::IsNullorEmpty($_)} |  group -noelement | sort Count -Descending | select -first $num

count_words.sh README.md 10
“A wise engineering solution would produce, or better, exploit-reusable parts.” – Doug McIlroy
Links
- Software Carpentry‘s online Bash shell lectures.
- G. Wilson, D. A. Aruliah, C. T. Brown, N. P. Chue Hong, M. Davis, R. T. Guy, S. H. D. Haddock, K. Huff, I. M. Mitchell, M. Plumbley, B. Waugh, E. P. White, P. Wilson (2012) “Best Practices for Scientific Computing“, arXiv:1210.0530 [cs.MS].